How to shoot 3-pointers
TL;DR: Follow the advice in the 4-Hour Chef.
Tim Ferriss's book the 4-Hour Chef is ostensibly a book about cooking, but really it's about how to learn anything quickly. In it, he applies the principles to a few non-cooking things including basketball.
Tim's methodology was to contact a basketball coach named Rick Torbett, famous for his coaching systems that any coach can use to coach players. Rick isn't a professional player who plays by sense of smell. Rick is a coach who knows how to take unskilled players and make them into skilled players. This is what we want.
The system for shooting a 3-pointer is based on what Rick told Tim. The principles apply to any two-handed basketball shot.
Let's go through it.
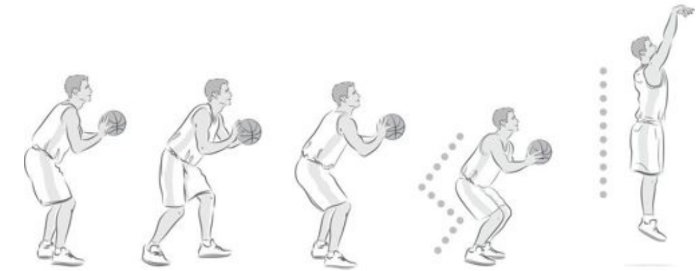
The set up
Keep elbows at 90 degrees when you are setting up to shoot. Like this:

Wrists should be bent back as shown.
Aiming (left-right axis)
Now we need to know how to line things up on the side-to-side axis:
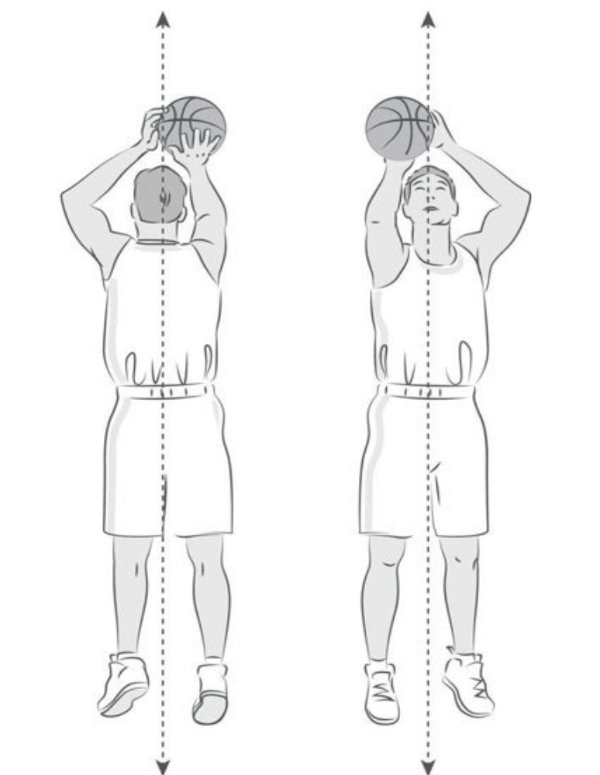
Figure out if you are right- or left-eye dominant. We need to know which eye you naturally aim with.
To test, make a little circle with your fingers like this:
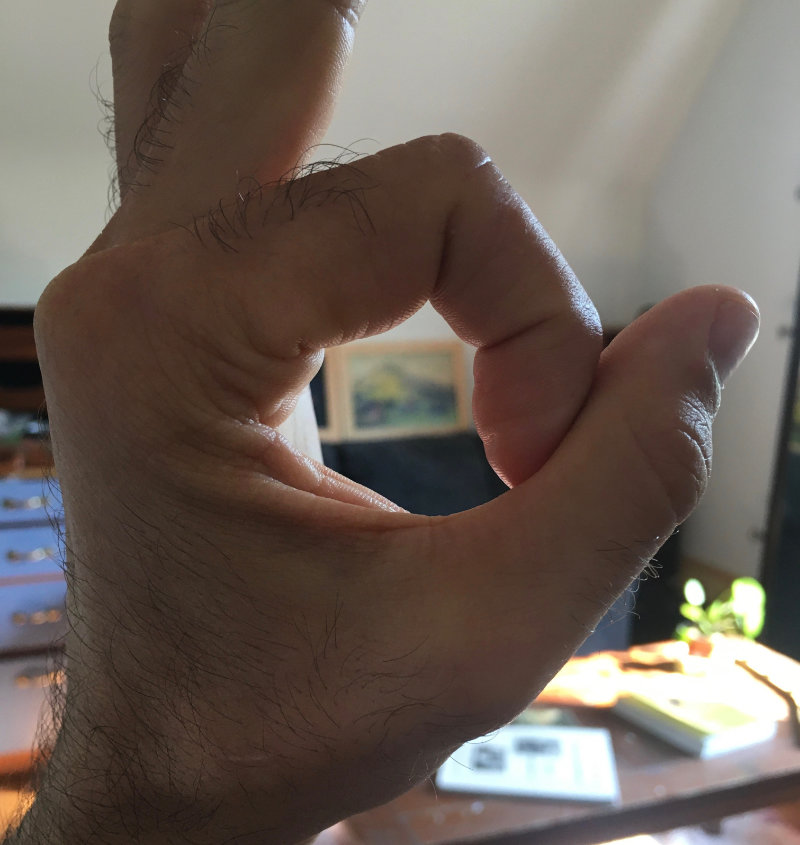
Look through hole at some object, like you’re sighting the object through the hole. Your hand should be a couple feet from your face.
Keeping your hand where you naturally put it, close one eye and then the other. You’ll see that with one eye the object is sighted but with the other eye, it’s not. Your dominant eye is the one you naturally sighted with.
When you are shooting, you’ll want to line up the ball so that you can aim with your dominant eye.
This is a bit more natural for people whose dominant hand and dominant eye are on the same side, but if you are a special snowflake like me, you’ll just have to shift your hands over a bit. You don’t have to shift it over all the way so that it’s perfectly aligned with your dominant eye, since you do use both eyes to aim, but according to Tim, a small shift for right-handed left-eye-dominant people can instantly increase accuracy like a “magic pill”.
Tim suggests aiming at the front of the rim. But there are many opinions from coaches on this: front of the rim, dead centre of the hoop, the triangle shape in the mesh, etc. It seems like the most important thing is to just pick a spot that seems to work for you and then stick with it until it become instinctual and you don’t have to think about it. Try Tim’s advice first.
From the set up to the actual shot you want to be moving the ball down the “shot line”. I think that means, you want the ball to be moving in the direction you are aiming from the time you have the ball lower down, to the time it leaves your fingers. And the follow through should also be along the same line. To keep in alignment when you are shooting you may wish to pay attention to your middle finger on your shooting hand as a way of making sure the middle of the ball is on the shot line.
Your shooting hand is the main hand you are using. It’s the right hand in the illustration above. The left hand is called the “guide hand”.
Propelling the ball
Legs are for distance. Arms are for aiming.
Even little kids can shoot from the 3-point line. Your legs are plenty strong enough, but you are going to struggle with aim if you try to push the ball with your arms.
The force generated by straightening the arm and “breaking” the wrist should account for only 3-4 feet of distance.
My guess is that the wrist breaking is mostly to put backspin on the ball.
If your shot is too long or too short, fix it with your legs not your arms.
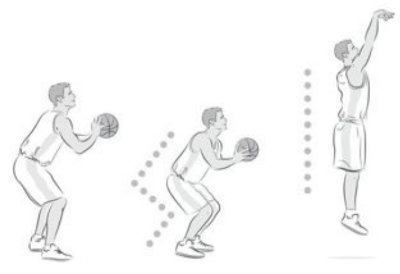
You want to crouch, straighten and then slightly jump.
Your wrist should break (snap down) when your feet come off the ground.
It should feel pretty much effortless to get the ball to the hoop from the 3-point line.
Two techniques that can increase distance:
- Speed up your hands. Starting from when you are setting up to shoot, to the point of release, make the whole sequence faster. (Faster means more momentum)
- Step into the shot, like this:
If you are right handed, start with your right foot back, take a step forward as you get into the crouch and spring upwards. I am guessing the idea is to keep a bit of forward momentum through this whole sequence.
A common mistake to avoid regarding momentum: negative motion.
You never want the ball to travel the wrong direction like this. You are using your legs and motion of your body to give the ball momentum, but if you move the ball in the opposite direction with your arms, you are negating some or all of that momentum. While your hands are on the ball, keep the ball moving forward towards your target, in an arch.
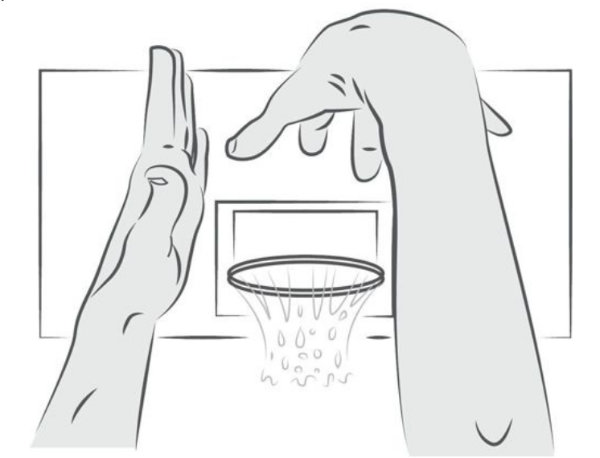
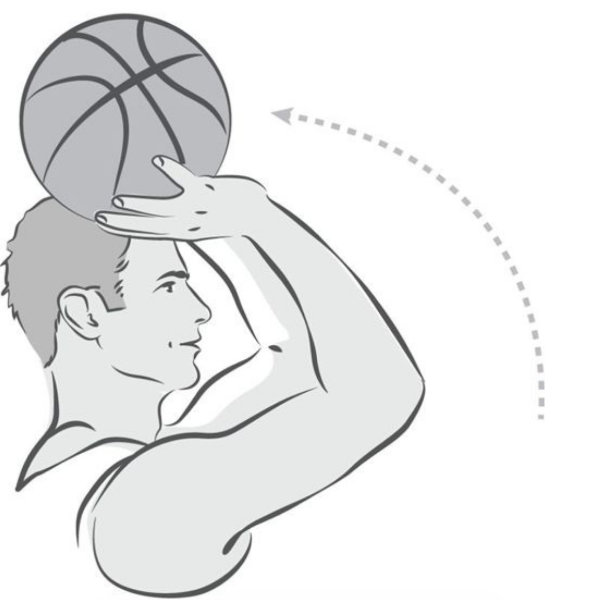
Follow through
After each shot during your practice sessions, check if your toes are pointing towards the target. They should be. If they aren’t, your body has twisted in a weird way.
Your hands should frame the hoop, like this:

You don’t want to drop your guide hand too quickly in the shot, so make sure it lingers in your follow through.
If your shot was too far left or right, the first thing to check is your guide hand or guide arm.
How to practice
Start your practice session with 25 shots from almost below the rim. Then another 25 from 5 feet away. For now just focus on your shot line and the breaking of the wrist.
Then practice shooting with an imaginary basket. If you have a partner, stand 20 feet apart and throw the ball back and forth, as if you are shooting at a 10-foot basket half-way between you two. So the ball will bounce maybe 5 feet in front of your partner. Then they’ll shoot at the imaginary basket. This is a good way to practice because you can focus fully on the basic technique and not on whether it goes in or not. And you don’t have to spend time chasing balls.
A solo variation on this is to use a wall instead of a partner.
Your goal for this is to try to shoot the ball straight (on the left-right axis). Don’t worry about whether your shots are short or long. If it’s on-target on that axis, consider it a successful shot.
Tim suggests to make it your goal to get 20 out of 25 shots straight. Once you can do this, you can move on to shooting into an actual hoop, which means you are now focusing on getting the right distance, using your legs.
Once getting actual baskets stops being a challenge, you can move on to trying to get a swish each time.